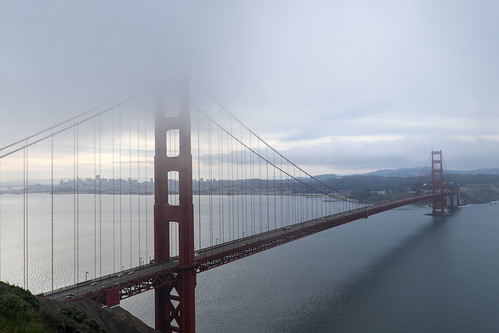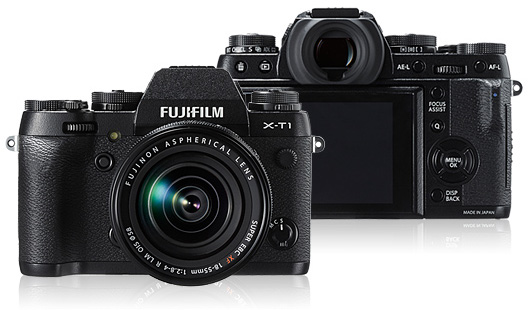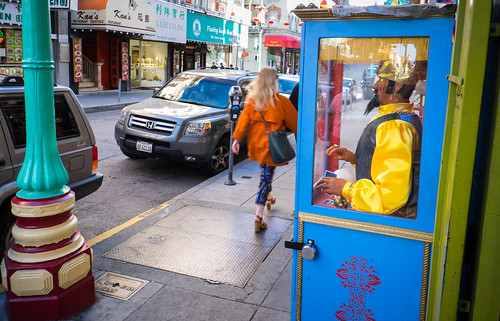
Thursday, October 15, 2015

THE JFWPHOTO BLOG HAS MOVED

Sad Face
Don't be sad, because I'm still blogging.

Below is the first post I made to this blog, titled Opening day, on July 30, 2004.
It is my hope that as I join the increasingly crowded world of blogging, I will be able to add something unique or at least a little entertaining, even if only to myself.
It's funny now that I thought I was entering a "crowded world" in 2004, but over the years I have continued to enjoy the act of blogging, hope I've been entertaining, but more importantly, I hope that you found it interesting and useful.

With the relaunch of my website using Squarespace several months ago, which I wrote about here, I've now moved the blog there also. From this point forward I will no longer be posting new content here.

You can now find the jfwPHOTO blog at http://www.jfwphoto.com/blog/.

And while you are there, please click on the navigation links to view my work, or click on the social media links and connect with me there.

Thank you for reading and for the continued support.

Thursday, September 10, 2015

TIME TO REVISIT OVERLOOKED PHOTOGRAPHS

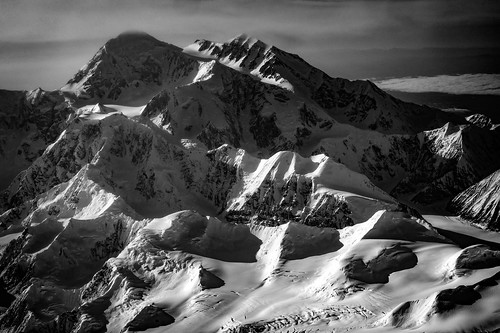
Mt. Denali
The final image of Mt. Denali edited in Adobe Lightroom CC and converted to black and white.
When I read the recent news about the name change of Mt. McKinley in Alaska to Mt. Denali, I remembered taking a photo through the window of a U.S. Coast Guard P-3 Orion late last year following an assignment in the Arctic.

After locating the photos on my hard drive, I quickly realized why I never bothered to process them at the time. They were bad. There was little color, no contrast, and very flat light. That was before I even bothered to notice all the dust spots. Nothing to get excited about here, right?

Original raw image shot with a Nikon D3S and 24-70mm f2.8 lens zoomed to 70mm, at 1/400, f13 with an of ISO 250.
Still, I did shoot in Raw, so I really had nothing to lose by bringing the photos into Adobe Lightroom CC and seeing if anything could be done to rescue them. After a few minutes of editing, something wonderful began to appear.

I am continuously amazed by the power of image editing software, especially Lightroom CC. Not only is it powerful software, but it is really easy to use and incredibly intuitive. While I use Adobe Photoshop CC as well, I find myself using Lightroom more and more as my primary image editing choice.

Lightroom has a very good spot removal tool, but because of the amount of clean up needed in this photo, I switched to Photoshop and used a combination of the spot healing and clone stamp tools.
However, when you combine the two programs then you have the ability to do some amazing things. Adobe realized this and now offers a photography plan where you get both programs for $9.99 a month.

Getting it right, or at least closer than I did with this photo, in camera is still the best thing you can do. But it also doesn't hurt to go back and see if you can turn those overlooked photos into something wonderful.

Online resources:

Lightroom Killer Tips
Adobe Photoshop Lightroom tutorials from novice to expert

Tuesday, September 08, 2015

5 REASONS I CHOOSE SQUARESPACE

The homepage features a slideshow gallery that advances automatically and displays photographs that do not appear anywhere else on the site.
Until the move to Squarespace, I was a hand-coder. Yes, I can admit it, I hand-coded my website. Even over many years and many iterations of jfwphoto.com, I continued to hand-code. Most recently it was a fairly simple site, one page deep and featured a java slideshow, my twitter feed and links to everywhere else you could find my work. It wasn't horrible, but it also wasn't anything I was particularly proud of or special and more to the point, I wasn't really driving anyone to the site.

I realized a while ago that it was time to get serious and finally have a website that I actually wanted to share with others and for that reason I made the move and relaunched my presence on the web.

Here are five reasons I made the switch from hand-coding to Squarespace.

1. One location for everything. It gives me a true presence, one URL, that I can now share which will highlight my photography, provide some information about myself, AND still provide a launching point to social media. There is still one BIG thing I have not yet moved, though. This blog. I do plan on eventually incorporating it and Squarespace offers step-by-step instructions on how to transfer most popular publishing platforms, including Blogger, into their framework without breaking links, etc. I just need a little more time.

I'm using the About page to also provide links to tear sheets and affiliate links. 
2. The content management system. I'm already an admitted hand-coder, therefore I know HTML and can build a website from scratch, but the reality is my skills will only allow me to build sites circa 2005. The web is so much more dynamic these days and having the ability to update a site quickly and easily was important to me. Squarespace makes it easy through their CMS and once you understand how it works, you can update or make changes in only a few minutes. I admit that I dove right in during the two-week trial and became a bit frustrated. However, once I took a step back, watched some tutorials, and looked at other Squarespace sites that used the same template I choose, the process of building my site became very easier. 

3. A wide selection of templates. The first thing that drew me to Squarespace was seeing other photographers using the platform. I liked the variety of templates, how most designs were clean and simple. One downside to temples, of course, is that all sites can begin to look the same. To make your site stand out, Squarespace gives you the ability to use custom code which I've started to incorporate and eventually is what I hope will make my site stand out. Also, switching between templates, even after your site is built is really easy to do and makes it possible to experiment with different looks.

This is typical of my gallery pages where I offer both navigation arrows and thumbnails. However, the commercial gallery seen here is the only place I offer full caption information on every photo.
4. Mobile devices. While I don't have current metrics on jfwphoto.com as proof, it is my belief that most people will be accessing my site on their phones or tablets. While not always ideal, having a website that scales and displays properly on a small screen is critical. Squarespace does a really nice job with this and I love how it looks on my Samsung phone and Apple iPad 2. I already have shared my site with others in this manner. 

5. Support. Let's face it, it's nice to be able to call someone when you have a problem. It's also nice to be part of a user base that offers inspiration, advice, problem-solving and provides customization tips when needed. Squarespace is well established, hasn't stagnated and continues to be one of the leaders in providing website services to photographers and other creative people.

With all the previous versions of my site, I would build it then and mostly forget it. However, with Squarespace I find myself revisiting every couple days, making small changes, or adding more photographs, or experimenting with styles. Why? It's easy.

And that's what it really comes down to after all, ease. A website that doesn't change or one that you don't use because it is too hard to update is a waste of a URL and does nothing to promote you or your photograph. So stop putting it off and give Squarespace a shot.


Friday, August 21, 2015

THE RELAUNCH OF JFWPHOTO.COM

Homepage of jfwphoto.com using the Squarespace Ishimoto template.
It's taken much longer than it should have, but I relaunched jfwphoto.com using Squarespace and finally have everything in one place*.

I've been thinking about this for years and now that the new jfwphoto.com has been public for several weeks and I've had the chance to work and refine it, I'm glad that I did this and question myself as to why I waited so long.

In a subsequent blog post, I'll go into the details on why I choose Squarespace and offer some insight into the process along with my experiences in building the website, but for now, I hope you take some time to view my site, offer some feedback, and most importantly, ask questions.

Landscape gallery page using slideshow with Show Thumbnails and Show Next and Previous Controls selected. I'm still trying out various gallery styles.
If you are thinking about using Squarespace, they offer a full week 14-day free trial with no credit card required. I would also recommend you watch a few of the tutorials.

* Everything except this blog. Also, I currently have a redirect on the domain jfwphoto.com through GoDaddy. Both of these will change.


Friday, August 14, 2015

FLICKR TOP TEN - PART II

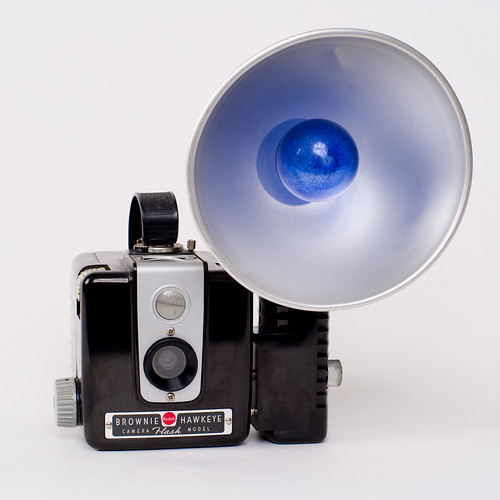
Kodak Brownie Hawkeye Flash Camera
January 13, 2011. Title: Kodak Brownie Hawkeye Flash Camera Description: Kodak Brownie Hawkeye Flash Model dates from 1950-61. Original cost for the Hawkeye was $5.50 and the flash was $7.00. Stats: 1,561 views, 4 faves, 0 comments Tags: brownie, kodak, hawkeye, camera, vintage, classic. Groups: None.
In Part II of my Flickr top ten blog post, I share photos five through ten, which in some ways are very different from the top five, however, there are also are a few similarities.

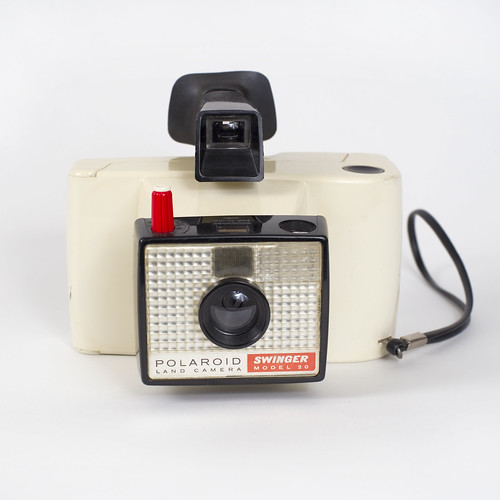
Number six, seven and ten, are some of the earliest photos I posted to Flickr and were part of a series I was working on about vintage cameras. I suppose that just given the amount of time they have been on Flickr, naturally they would accumulate views. I did notice that I was not sharing my photos to groups during this time, so realistically views could have been much higher. At some point, I did add number ten to several groups after they reached out to me with a request.

Polaroid Swinger Model 20
January 19, 2011. Title: Polaroid Swinger Model 20 Description: The Polaroid Model 20 Swinger was produced by the Polaroid Corporation between 1965 and 1970 and cost $19.95. Stats: 1,545 views, 0 faves, 0 comments Tags: Polaroid, swinger, model 20, vintage, camera, land camera. Groups: None.
Another thing about these photos is that only 400 views separate the number six photo from the number ten photo. I don't know exactly what that means, except that it stood out to me.

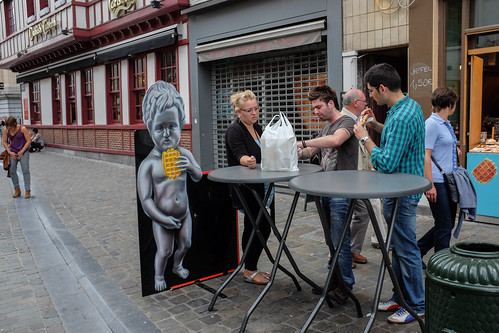
Number eight is another photo which features the Manneken Pis, although in a very different way that my number one most-viewed photo which was featured in Part I. In this photo I was focusing on the three people at the table and it was only later during post production that I notice the woman to the left.

Manneken Waffles
August 18, 2013. Title: Manneken Waffles Description: Manneken Pis is a famous Brussels landmark depicting a naked little boy urinating, and can be seen in advertising all over the city. Stats: 1,515 views, 1 faves, 0 comments Tags: X100S, Fuji, Manneken Pis, Brussels, Belguim, Belgium, advertising, coke. Groups: Fuji x100s
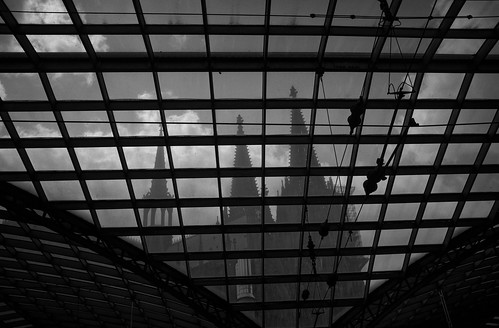
Number nine is a photo that I like, but certainly not one that I would put in my top ten favorites. I notice that many of my photos from Europe, especially those taken in Germany, do very well on my Flickr site. If I continued on down the most viewed list you would see many more photos from Germany and Belgium, including another Manneken Pis in the top twenty.

Cologne Cathedral
August 20, 2013. Title: Cologne Cathedral Description: The Cologne Cathedral is a Roman Catholic church in Cologne, Germany, and the seat of the Archbishop of Cologne and the administration of the Archdiocese of Cologne. Stats: 1,221 views, 2 faves, 0 comments Tags: X100S, Fuji, Cologne Cathedral, Germany, church, catholic. Groups: Cologne black & white, Fuji x100s, Digital Black and White.
This has been a fun two-part post to write and has given me a chance to look back over some photographs  that I posted about the same time that I relaunched this blog in 2011. I am constantly reminded how wonderful it is to have photo sharing sites like Flickr, along with social media, to get your work out there, to be shared and viewed by others. I know it has made me fall in love with photography, particularly, my personal work, all over again.

I think back to when I started taking photographs professionally in 1985 and at that time I never had any idea that my work would be seen by this many people. I'm still a small fish on Flickr, something I'm working on changing, but for now I'm content with my followers and looking at the work of those I follow.

Thank you, and let me know you Flickr username. I'll be sure to visit, leave a comment and follow you.
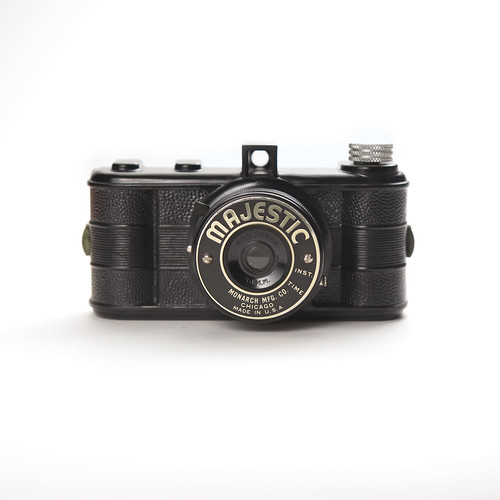
Majestic Toy Camera
July 26, 2011. Title: Majestic Toy Camera Description: Majestic toy camera from the Monarch Manufacturing Company, Chicago. Stats: 1,140 views, 2 faves, 2 comments Tags: Majestic, Toy Camera, Monarch Mfg.Co., Chicago. Groups: Historic Camera, Camera-wiki.org

Friday, August 07, 2015

FLICKR TOP TEN - PART I

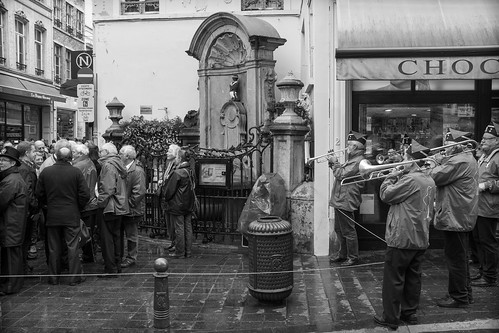
Manneken Pis
October 17, 2013. Title: Manneken Pis Description: The small bronze fountain sculpture in Brussels, Belgium, depicts a naked little boy urinating into the fountain's basin. Stats: 4,947 views, 1 fav. Tags: fuji, X100S, Europe, Brussels, Belgium, Manneken Pis, pee, boy, Black and White, sculpture, fountain, attraction, tourist. Groups: Fuji x100s, Fuji X100s B&W, Digital Black and White.
I was recently looking at my Flickr stats and thought it would be interesting to take a closer look at my top ten most viewed photographs and see what, if anything, I could learn about them or learn about Flickr.

First, let's look at my stats. I've been a member since 2008 and posted 661 photos that have been viewed 172,321 times. I currently follow 123 photographers and have 105 following me.

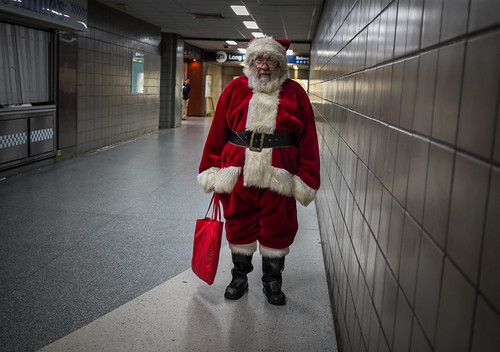
Santa Claus
December 24, 2013. Title: Santa Claus Description: Hope that the Long Island Railroad guides him home safely tonight. Merry Christmas! Stats: 3,709 views, 31 faves, 1 comment Tags: fuji, X100S, Santa Claus, Penn Station, New York City, Christmas, holiday, St. Nick, NYC. Groups: Fuji x100s, New York Photography, The Candid Frame, in explore.
In part one of this two-part post, I share the top five along with relevant information about each photo and try to see if I can understand why these photos rose to the top.

The number one photo, Mannekin Pis, with over one thousand more views than the number two photograph, is somewhat of a mystery to me. First, I don't think it is a particularly remarkable photo although I do like it, but is it a 1000 times more remarkable than any other photo on my page. My only guess on why this is at the top has to do with tags. And if this is the case and you go back and read the tags under the photo you might be a little disturbed. Unintentional on my part, but who knows what people are searching for. Also, having been to Belguim a half dozen times in the past three years, I know that there is always a crowd around this site, so maybe it has nothing to do with specific tags.

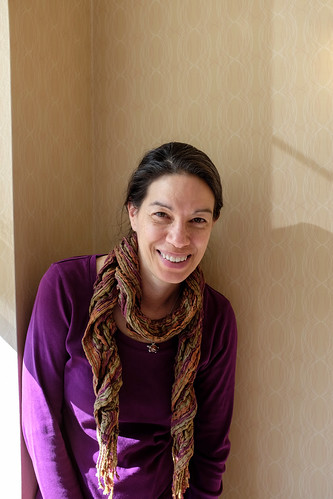
Stairwell Portrait
June 1, 2013. Title: Stairwell Portrait Description: Fuji X100S portrait taken in the stairwell of the Marriott Residence inn in Mississagua, Ontario. Stats: 3,074 views Tags: blog.jfpwhoto.com, Toronto, Ontario, Canada, portrait, light, mississagua. Groups: None.
The number two photo is one that I do like and is currently featured on my website. It also was featured in Explore on Flickr which I'm sure added to the total number of views, especially if everyone who received a new digital device on Christmas morning was browsing Flickr.

Number three is a very simple portrait, taken in a few seconds, mostly to test the capabilities of a Fujifilm X100s that I had on loan before I decided to purchase the camera myself. I have very few portraits on posted to my Flickr site, so maybe portraits just do better. This photo also was never shared to a group and I misspelled Mississauga in both the description and tags. (Flickr updated with correction)

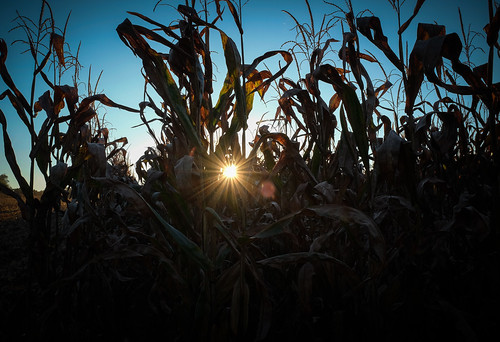
Cornfield
September 14, 2013. Title: Cornfield Description: None Stats: 2,656 views, 48 faves, 4 comments Tags: Kentwood Park, Md., USA, Delaware Bay, Chesapeake Bay, Bridge, light, Lens Flare. Groups: None.
At number four is a photo titled Cornfield and it is one that I didn't even upload until I happened to see the Flickr blog post with the theme of starbursts and remembered that I had taken this photo earlier that year. I posted the photo and it was picked up by Flickr and featured, which explains the number of views, despite no description and not being shared with any groups.

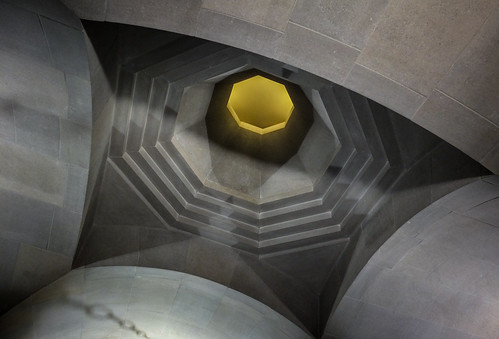
And like the first photo, I don't think the fifth most viewed photo, the ceiling of the Armenian Classroom taken during a visit to the University of Pittsburgh for my son's graduation, is all that great. It could be the title, or detailed description that helps people find this photo.

Armenian Classroom
April 28, 2013. Title: Armenian Classroom Description: The ceiling of the Armenian Classroom located in the University of Pittsburgh's Cathedral of Learning. The Nationality Rooms are located on the first and third floors and were designed to represent the culture of various ethnic groups that settled in Allegheny County and are supported by these cultural groups and governments. Stats: 2,543 views, 4 faves, 3 comments Tags: Pittsburgh, Pa. USA, Armenian Classroom, University of Pittsburgh, Cathedral of Learning. Groups: Fuji X10, X20 and X30, Fujifilm X10, digital compact only -- p1 / a2 -- open EXIF --.
If you are on Flickr, check your stats which can be accessed in the drop-down menu under You at the top of the page. In Part II of this blog post, I'll share number five through ten. 

Tuesday, July 07, 2015

PASSPORT PHOTOS - IT'S REALLY NOT THAT HARD

Examples of proper passport photographs from travel.state.gov.
It happens to all of us, professionals and amateurs alike. You can almost hear the question coming before the speaker opens his or her mouth. DO YOU DO PASSPORT PHOTOS!

Before you hang your head, roll your eyes or something worse, consider your options.

Of course, you could tell them that for around $12 they could go to a drug store or any number of stores that are set up to do this kind of thing. You could let them know that in certain city's there are mobile studios set up right outside the immigration building that will do it lickety-split.

Or consider for just a moment that you can invest ten minutes of your time and take the photo yourself.

And finally, maybe you are the one who needs a passport photo. After all, you have all the equipment to get it done, so why would pay someone else to do it.

Maybe it is so easy to do that even if you are reading this and don't consider yourself a photographer, you'll be able to do it.

Using the Department of State's free photo tool takes all the guesswork out of crop and sizing your final image.
What do you need?

A digital camera (even a new phone would do), a white or off-white wall and plenty of natural or artificial light.

What you don't need is software or more specifically expensive software such as Adobe Photoshop to crop and size your photos. So if this was the barrier that kept you from fulfilling the passport photo request, keep reading.

The most time-consuming and intimidating part of the process for most people is normally the sizing of the final image, according to very specific guidelines from the federal government. You've heard the whole "2 x 2 inches sized such that the head is between 1 inch and 1 3/8 inches from the bottom of the chin to the top of the head." What, and how do I make that happen?

This is one of the few times that the government has made something really simple. Upload you photo to this website and use the tool to resize and save the photo. That's it. It takes all the guess work out of the sizing and cropping process.

Unless you have a photo printer in your home, you will still need to visit that drug store to print your new passport photo on either matte or glossy paper, but at 29¢ per print, you can also afford to print a few extras for Mom.

Additional resources:

Photographer's Guide
Photo Requirements
Frequently asked photo questions

Friday, May 08, 2015

5 TIPS FOR PHOTOGRAPHING IN MUIR WOODS


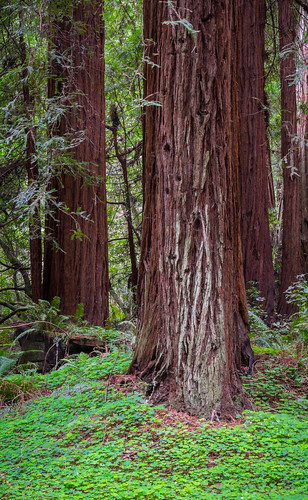
Occasionally, some light makes its way to the forest floor. 0.5 sec @ f11, ISO 200.
Occasionally, some light makes its way to the forest floor which adds some nice contrast. 0.5 sec @ f11, ISO 200.
If you are visiting the San Francisco Bay area, I urge you to take the time and plan a visit to Muir Woods National Monument. Located just 12 miles north of the city in Marin County, California, and part of the Golden Gate National Recreational Area, Muir Woods features 240 acres of old-growth Coastal Redwoods and plenty of photographic opportunities.

I recently spent five hours exploring the park and hope that you will benefit from the five photographic tips below.

1. Lens selection. I would probably leave the telephoto behind, but that doesn't mean you need to bring only super wide-angle lenses. The Coastal Redwoods are big and everywhere, so you will not need a telephoto to see them, but adding something in the 70-120mm range would allow you to compress a scene or reach some trees that may be a little further off the path. A longer lens could als come in handy if you want to aim up into the canopy.

As someone who does not shoot a lot of verticals, this location was the exception. 1/2.3 @ f18, ISO 200.
As someone who does not shoot a lot of verticals, this location was the exception. 1/2.3 @ f18, ISO 200.
2. Don't forget the tripod. You will be doing a lot of walking during your visit and you might be tempted to leave the tripod behind. Don't. Even during a bright sunny day, not much light filters down to the forest floor, forcing you to shoot at very slow shutter speeds even if you have fast lenses. And even thought tripods are allowed in the park and the paths are fairly wide, remember to be courteous to other visitors, especially during busy times.
"This is the best tree-lovers monument that could possibly be found in all the forests of the world". - John Muir
3. Stay on track. Photography is allowed throughout the park, but you must remain on the paths. There is an easy loop path with an occasional trail that branches off. It took me about four hours to make the loop, but you could certainly do it in less. My recommendation would be to spend the whole day and plan on making several trips around the loop or take advantage of a ranger-led program.

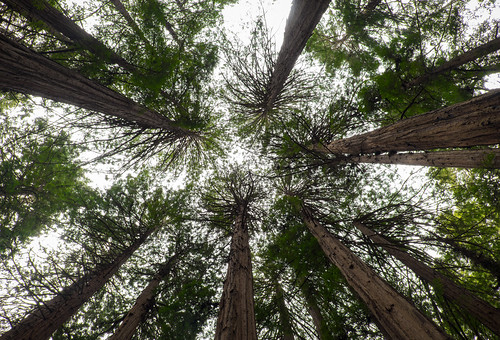
There are a few places along the trail such as Cathedral Grove where you are able to get nice canopy shots from the trail. 0.3 sec @ f14, ISO 200
There are a few places along the trail such as Cathedral Grove where you are able to get nice canopy shots from the trail. 0.3 sec @ f14, ISO 200
4. Get there early or late. Normally this tip would refer to taking advantage of the best light, but in this case it is all about the parking and crowds. Parking is very limited, especially on weekends, but even during my weekday visit, I noticed parking was gone, even a mile down the road, when I left the park around 2 p.m. Another option would be to take the Muir Woods shuttle which runs on the weekends from April 4th through October 25th. The park is open from 8 a.m. to sunset.

Redwood sorrel is just one of the shade-loving plants that thrive under the redwood canopy. Look for wildflowers in winter and early spring. 1/13 @ f4.5, ISO 200.
Redwood sorrel is just one of the shade-loving plants that thrive under the redwood canopy. Look for wildflowers in winter and early spring. 1/13 @ f4.5, ISO 200.
5. Big picture - small picture. I was amazed by how much these Coastal Redwoods would impact me. Their size and beauty had me yearning to just shoot wide, take it all in with every frame. But that didn't always convey the true size of these magnificent trees as I reviewed the pictures. Force yourself, as I did, to try other focal lengths in order to achieve a different look. And if you have a macro lens, be sure to bring that too. There are incredible textures everywhere and plenty of interesting subjects on the ground if you can manage to look down.

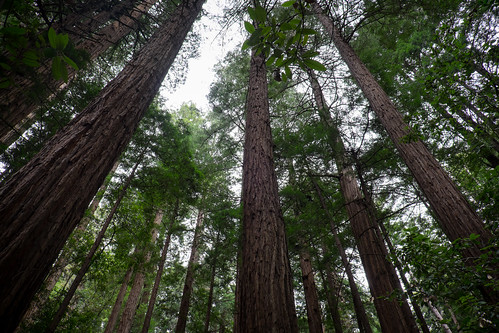
Shooting from a low angle with a wide angle lens enhances the grandeur. 1/8 @ f8, ISO 400.
Shooting from a low angle with a wide angle lens enhances the grandeur. 1/8 @ f8, ISO 400.
Finally, be sure to take some time and relax during your visit. Since the lighting is fairly constant, there really is no need to rush, or limit your visit to the "best time" of the day for shooting. Find a bench, take a seat, and just enjoy this beautiful redwood forest that William and Elizabeth Kent donated to the federal government in 1908.

Download a PDF to learn more about the history of the park and the California Redwoods.

Monday, April 27, 2015

MAKING THE BEST OF WORLDWIDE PINHOLE DAY

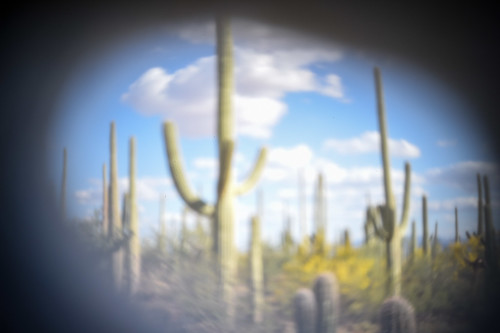
Pinhole photo of Saguaro cactus taken with a Nikon D4S. One-second exposure, aperture unknown.
I really enjoy pinhole photography and ever since I built a camera and took that first shot in 2013, I've made it a point to participate in the Worldwide Pinhole Photography Day (WPPD). This international event is held each year the last Sunday in April in order to promote and celebrate the art of pinhole photography.

Surrounded by digital in my full-time job, I enjoy the opportunity to produce an image on photographic paper using nothing more than a box with a tiny hole and some chemicals. It always provides a challenge and seeing a negative appear on paper as it sits in the developer, reminds me of excitement I felt the first time I stepped into a darkroom over 35 years ago.

So this year I was disappointed when I realized that because of an early Sunday flight to Tucson, Arizona, for an assignment meant that I would not be able to participate. After all, it would not be practical to bring my pinhole camera and chemicals with me. I briefly thought about pre-loading my camera and bringing it along, or maybe get up early and taking one photo before my flight, but neither of these options seemed to excite me enough to do them.

During the flight, I began thinking about missing out on WPPD and that's when it hit me. What is a pinhole camera and why not just use what I had with me, a Nikon D4S with a body cap, to make one. One of the reasons I left so early from Washington, D.C., was so that I could arrive in Tucson early enough to spend some time in the Saguaro National Park before my assignment started on Monday. So I had the time and now I had an idea on what I would do.

Tools used to make the hole in the camera's body cap.
Tools I used to make the hole in the camera's body cap.
After landing, I stopped at a local drug store and picked up a pack of sewing needles, a small roll of duck tape and a package of lighters. Total cost $4.50. I secured a small pebble to the top of the needle using the duck tape and then using the lighter, heated the tip so that I could push it through the center of the body cap. It took a few tries, but really there was nothing more to it.

One big difference of course between this "pinhole camera" and mine is that I was able to see the results of my efforts on the digital display instantly and make adjustments until I had the proper exposure. Too easy.

It wasn't as much fun as previous years, but I can say that I participated in WPPD 2015, and that makes it all worthwhile to me.

Sunday, March 29, 2015

5 TIPS FOR PHOTOGRAPHING THE GOLDEN GATE BRIDGE

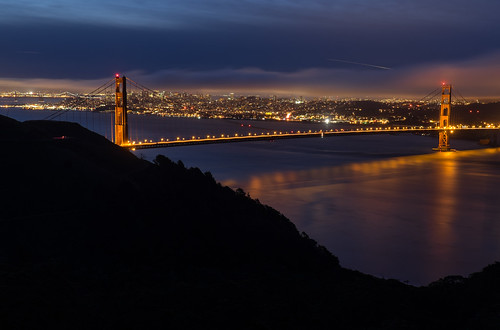
The Golden Gate Bridge a half hour prior to sunrise. 30 sec. @ f8, ISO 200.
The Golden Gate Bridge a half hour prior to sunrise. 30 sec. @ f8, ISO 200.
Before I get to my five tips, I will state right up front that much like my blog post, Five Tips for Shooting Antelope Canyon, this was my first time photographing the Golden Gate Bridge. I say that only to admit that I'm not the expert and in fact I welcome comments, additional tips or even to tell me I'm wrong.

However, as a professional photographer, you might find it interesting how I approach a subject that I never photographed and only have a limited time to do so. In this case, I was in San Francisco for three days, but all of that time was not dedicated to taking pictures of possibly the most photographed bridge in the world. Also of note, all of the photos were taken with a Fujifilm X-T1 mirrorless camera that I had for review.
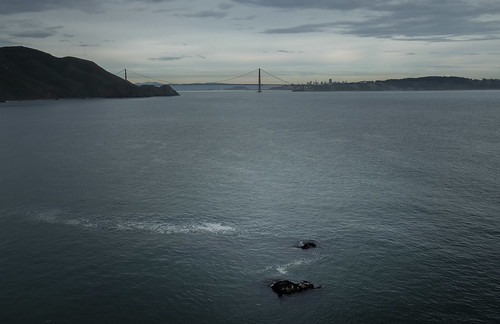
Consider a rental car or Zip car so you can get to locations away from the crowds, like this photograph of the bridge taken from Point Bonita Lighthouse just before sunset. 1/18 @ f22, ISO 200.
Consider a rental car or Zip car so you can get to locations away from the crowds, like this photograph of the bridge taken from Point Bonita Lighthouse just before sunset. 1/18 @ f22, ISO 200.
Also while it is possible to get to the Golden Gate Bridge via public transportation, tour bus or even by bike, renting a car seems to be the easiest and most convenient way to get to many of the shooting locations, especially if you have limited time or want the ultimate flexibility to chase light.

1. Location, location, location. There are numerous locations or vantage points to photograph the bridge and I'll cover just a few even though I'm sure locals have all kinds of hidden spots picked out.

I shot from three basic locations on the North side and two on the South or San Francisco side of the bridge. On the North, it was Vista Point, Battery Spencer, Marin Headlands (Hawk Hill) and on the South, Lands End, and the South Side parking lot.

Vista Point is the first exit after crossing the bridge heading north and while it offers an alright view of the bridge, my suggestion would be to skip the crowded parking lot and head down the hill towards the Coast Guard Station where you can view the bridge from a low angle. Then walk up to the Vista Point visitors center for an additional view.
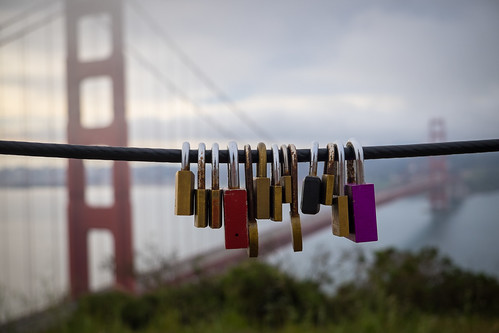
A different look at the bridge from Battery Spencer. 1/1700 @ f3.2, ISO 400.
A different look at the bridge from Battery Spencer. 1/1700 @ f3.2, ISO 400.
After leaving Vista Point cross under the bridge and start the climb up Conzelman Rd. making Battery Spencer your first stop. This is a great location and it was the first place that I stopped to photograph the bridge. I was surprised how close the bridge was and you feel like you are at eye level with the bridge towers. Nice vantage point to shoot verticals too.

After leaving Battery Spencer, you continue to climb until you reach the highest point, Hawk Hill. From this vantage point, you get a great overview of the bridge with the city behind it. Don't forget to explore the old World War II batteries while you are there and if you continue on foot through former gun emplacement tunnels to the other side, you will have a bonus view of the Point Bonita Lighthouse.

There are several stopping points along the way so take your time and pull over every chance you get either on the way up or on the return trip, because the view is different and unique each time.

Screen shot from my iPad of the SunSeeker App showing my location and sun direction on the morning of March 17, 2015, as I was attempting to photograph sunrise. One of the nice things about this App is that you can pick a day and time in the future so that there are no surprises, except maybe rain and fog.
Screen shot from my iPad of the SunSeeker App showing my location and sun direction on the morning of March 17, 2015, as I was attempting to photograph sunrise. One of the nice things about this App is that you can pick a day and time in the future so that there are no surprises, except maybe rain and fog. 
2. Timing is everything. Make sure to leave yourself enough time and shooting days to capture the bridge during different times of the day. If you are planning to shoot sunrise or pre-sunrise from Hawk Hill, Conzelman Rd. is closed about a half mile from the top until after sunrise. There is a parking lot, so join the bicyclists and joggers as you make your way to the top. Not too bad, but don't be surprised as I was.

Once again, I used the Sunseeker App to determine sun direction which helps determine where I'm going to start and end my day. Knowing where the sun will be during certain times of the day can help you pre-visualize photographs as you drive around scouting locations.

The Vista Point visitor center gets crowded with both cars and people. I found most people moved on quickly so if you want a particular shot, just wait a few minutes. 1/100 @ f11, ISO 200.
The Vista Point visitor center gets crowded with both cars and people. I found most people moved on quickly so if you want a particular shot, just wait a few minutes. 1/100 @ f11, ISO 200.
3. Avoid the crowds. It is clear that you are not the first person who has thought about photographing the Golden Gate Bridge, so be prepared for crowds, especially at the visitors centers. Sometimes you may also have to pass by a pull-over because it is full, but remember there will be another. It was my experience that if you have a little patience while people grab their selfies, they will move on allowing you to get your shot.

And as in most situations, you lessen your chance of running into crowds by getting there early and staying late. After all, isn't that the best time to shoot anyway? So take a break in the middle of the day and head over to Sausalito for some tacos and Mexican beer at the Salsalita Taco Shop while everyone else is fighting for a spot to photograph the bridge in the noon time sun.

Think about details and capturing pieces of the bridge, even from underneath. This was taken while walking from the Coast Guard station up the hill to the Vista Point parking area. 1/350 @ f9, ISO 200.
Think about details and capturing pieces of the bridge, even from underneath. This was taken while walking from the Coast Guard station up the hill to the Vista Point parking area. 1/350 @ f9, ISO 200.
4. Look for something different. The temptation is to go wide and take in the entire bridge. That makes a nice shot and sets the stage, but don't forget about details. With a telephoto lens, you can pick out details from many of the shooting locations I mentioned previously, but there are also places to access the bridge from underneath. And while I didn't get the chance on this trip, you can also walk or bike across the bridge, which would certainly get you up close and personal.
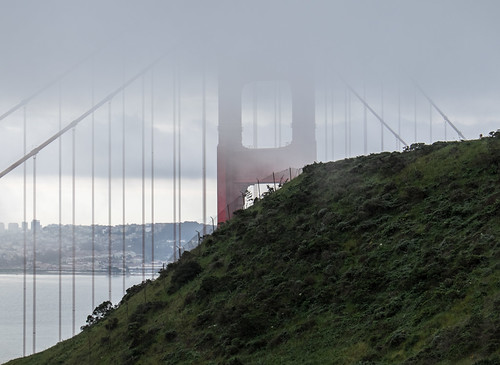
Among the first photographs I took of the bridge, was as I made the short climb at Battery Spencer which puts you at eye level with the bridge towers and in this case almost in the clouds. 1/60 @ f10, ISO 400.
Among the first photographs I took of the bridge, was as I made the short climb at Battery Spencer which puts you at eye level with the bridge towers and in this case almost in the clouds. 1/60 @ f10, ISO 400.
5. Weather can be your friend. I could state the obvious and just say that the weather, especially clouds and fog, are unpredictable in San Francisco, or I could tell you to embrace it and use it to your advantage. On my first day photographing the bridge, I could only make it half way up Conzelman Rd. before the visibility dropped to near zero. But those same clouds added something to my photos taken from Battery Spencer when they covered just the top of the bridge.

The point is, don't make a judgment from your hotel room downtown. Get out to the locations you scouted and see for yourself because you never know when the weather will change and maybe even change in such a way that takes your photograph from alright to awesome.

Photographed from the trail at Lands End. I rarely use presets, but something about this photograph reminded me of a classic postcard, so I added Yesteryear, and Rounded Corners White presets in Lightroom 5. 1/2000 @ f4, ISO 200.
Photographed from the trail at Lands End. I rarely use presets, but something about this photograph reminded me of a classic postcard, so I added Yesteryear, and Rounded Corners White presets in Lightroom 5. 1/2000 @ f4, ISO 200.
As I said at the beginning of this blog post, there are many more locations to explore and photograph the bridge such as Crissy Field, Fort Point, Point Cavallo, Baker Beach and many, many more. In fact, maybe three days is not enough time.

So make the trip, have fun, and when not photographing the bridge, there are all kinds of other locations around the city to photograph.
Monday, March 23, 2015

SEVEN DAYS WITH THE FUJI X-T1


The first place I headed after landing in San Francisco was the Golden Gate Bridge. 1/200 @ f9, ISO 200.
The first place I headed after landing in San Francisco was the Golden Gate Bridge. 1/200 @ f9, ISO 200.
I recently spent seven days in and around San Francisco, California, with the Fujifilm X-T1. The X-T1 is the fourth of the Fuji X cameras that I've had the chance to use, starting with the X-10 in 2012 and most recently the X-Pro1 during seven days in New York. Of course, my everyday carry camera continues to be the X100S.
Fujifilm X-T1 mirrorless digital camera. Photo courtesy of Fujifilm.com
As with the X-Pro1 and my first experience with the X100S, I rented the X-T1 along with the 18-55mm kit lens and a spare battery from Borrowlenses.com. Before a review camera arrives, I download the manual, then read and watch other reviews or tutorials in order to familiarize myself with all the features. Then once the camera arrives I check to make sure the firmware has been updated and in this case while the camera was up-to-date, I did have to update the lens.

I never really felt as comfortable doing street photography with this camera as I have with previous Fuji X rangefinders such as the X-Pro1 and the X100S. 1/15 @ f6.4, ISO 200.
I never really felt as comfortable doing street photography with this camera as I have with previous Fuji X rangefinders such as the X-Pro1 and the X100S. 1/15 @ f6.4, ISO 200.
Right out of the box I liked Fuji's attention to detail and style. The camera felt nice in my hands and the shutter speed, exposure compensation, and ISO dials were solid and easily accessible on top of the camera. In fact, once I went through the electronic menus and set up my preferences, I did not have to return to them for most shooting situations. Fuji really has this down and with the Q menu feature, which is now standard, your most used menu items are only one-click away, and if not, then you can customize them.

I found the 18-55mm lens very sharp at all focal lengths and appreciated the zoom, especially during this review period where I was covering a variety of scenes. 1/13 @ f4.5, ISO 200.
I found the 18-55mm lens very sharp at all focal lengths and appreciated the zoom, especially during this review period where I was covering a variety of scenes. 1/13 @ f4.5, ISO 200.
Three things I noticed right away that made this camera different from previous Fuji cameras I've reviewed. It is not a rangefinder, the SD card slot is separate from the battery chamber and there is a tiltable LCD screen. Two of these I really liked.

The rangefinder is what first attracted me to the Fuji cameras and it remains what I like best about my X100S. In the X100S and the X-Pro1 you have a choice between an Optical Viewfinder (OVF) and an Electronic Viewfinder (EVF), but with the X-T1 you only have the EVF. And while the EVF is good, using it all the time felt like I was missing something. a connection with my subjects. This was especially true when I was shooting in continuous focus mode and it never seemed to lock focus. When I took the photo and the preview would appear, the photo was sharp, but while framing shots the focus just never seemed to lock in, even with camera on a tripod.

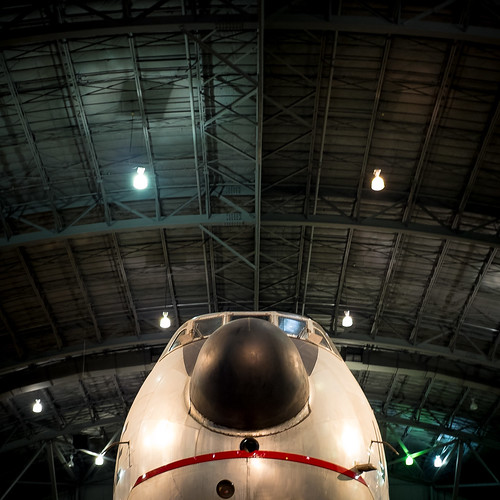
Having a tiltable LCD screen meant that it was extremely easy to take this shot with the camera pointing straight up. 0.3 sec @ f14, ISO 200.
Having a tiltable LCD screen meant that it was extremely easy to take this shot with the camera pointing straight up. 0.3 sec @ f14, ISO 200.
I never gave tiltable LCD screens a second thought. In fact, when reading rumors of an X-Pro2 it always mentioned a tiltable screen and I would roll my eyes. However after using the tiltable screen on the X-T1, I think I'm a convert and found myself using it often. It saved me from laying on my stomach when shooting macro or low angles and seemed to be a wonderful option when shooting straight up.

Lastly, having the card slot separate from the battery compartment seems insignificant, but there were definitely times when it comes in handy. Such as when the camera was mounted on a tripod (or has the tripod plate attached) it is nice to still be able to access the camera card. Maybe it is just me, but I always seem to release the battery when what I really want to do is eject the camera card, and this eliminates any chances of that. Although I think the real reason Fuji did this was to accommodate the vertical battery grip which I'm sure also adds balance to the camera, especially with longer lenses attached.

Fujifilm XF 18-55mm f 2.8-4 R LM OIS zoom lens. Photo courtesy of www.bhphotovideo.com
During the review, I used the Fujinon XF18-55mm f 2.8-4.0 zoom lens "kit lens." A "kit lens" normally denotes an inexpensive starter lens that comes with a camera, but I found that this lens performed very well. I noticed good contrast and sharpness throughout the zoom range and nothing felt "cheap" about it. One feature I did miss was having the f-stops printed on the lens barrel. I typically shoot in aperture priority mode, so knowing what f-stop I'm at is critical to controlling my exposure. When walking around with my camera, I'm always checking my camera settings so that as light or situations change, I can make adjustments before I'm ready to shoot. With this lens, I had to bring the camera up to my eye and look into the viewfinder. A new Fujinon XF 16-55mm f2.8 lens is now available and would have been my choice if street or low light photography was my goal. 

This camera does not have a built in ND filter like the X100S, so the slowest shutter speed I could get was 1/18 in this situation when I would have preferred something slower. 1/18 @ f22, ISO 200.
This camera does not have a built in ND filter like the X100S, so the slowest shutter speed I could get was 1/18 in this situation when I would have preferred something slower. 1/18 @ f22, ISO 200.
The 18-55mm lens has Optical Image Stabilization, which I left it on during the entire review period, so I don't have any examples of it turned off for comparison, however, looking at my photos now, even shots taken hand-held at fairly slow shutter speeds, they are sharp. A small lens shade is included, although I experienced considerable lens flare, even with the sun at 90 degrees. This is something I did not notice when using the XF 35 f 1.4 lens during my review of the X-Pro1.

One thing about carrying a mirrorless camera, I am much more likely to notice shots like this during lunch in Sausalito. 1/140 @ f5, ISO 400.
One thing about carrying a mirrorless camera, I am much more likely to notice shots like this during lunch in Sausalito. 1/140 @ f5, ISO 400.
I spent the majority of the seven days shooting landscape or outdoor scenes with the camera on a tripod which is very different than my previous reviews of the X-Pro1 and the X100S. So while that let me learn a few things about this camera, it really made me feel like I was missing what I really like about Fuji X cameras - street photography. The X100S and the X-Pro1 are naturals for street photography, but I just never got the same feel with this camera. For some reason, I also seemed to draw more attention to myself with this camera. The lens does stick out from the body which might be more intimidating, or I maybe I just didn't appear comfortable or casual while carrying it.

There is built-in WiFi that when paired with an IOS or Android device, lets you browse and transfer images or control the camera remotely. After some initial difficulty getting the camera to pair with my phone*, I found that it worked well. And it was useful to browse photos and transfer some for sharing on social media which I previously did using an Eyefi Mobi card. What I really would have found useful in this App, is to have the film simulation modes so I could process the photos without having to do it in-camera first.  

Like with previous cameras, I set the X-T1 to shoot Raw + JPEG with the JPEG set to MONOCHROME + Ye filter. With the Firmware V3.00 update, you will be able to enable the classic chrome film simulation mode. 1/600 @ f7.1, ISO 400.
Like with previous cameras, I set the X-T1 to shoot Raw + JPEG with the JPEG set to MONOCHROME + Ye filter. With the Firmware V3.00 update, you will be able to enable the classic chrome film simulation mode. 1/600 @ f7.1, ISO 400.
Final thoughts. This is another nice camera from Fuji and I would have no problem recommending it to someone as their primary camera, even to someone considering going pro. If, however, you already own a DSLR and are looking for a second camera to carry around every day or when working the streets, then I would stick with the X100S or the new X100T.

But you know what I really want is an update to the X-Pro1. An updated rangefinder with interchangeable lenses. Now that's what will get me to spend my money.

*I originally downloaded the wrong App, which wasn't very clear in the Play Store. And based on the one-star reviews, I don't think I was only person making this mistake.

Tuesday, March 10, 2015

PHOTOGRAPHING THE KENTUCKY BOURBON TRAIL


Bourbon barrels aging at Woodford Reserve. 1/15 @ f2.0, ISO 400.
Two weeks ago on my way to photograph the Great Smoky Mountains, I decided to spend a few days traveling the Kentucky Bourbon Trail. What? Yes, there is such a thing as a bourbon trail. In 1999, the Kentucky Distillers' Association formed the bourbon trail to educate visitors about the rich history and traditions of bourbon, which in 1964 Congress declared a "distinctive product of the United States."

Okay, so now that we've determined that there is such a thing as the bourbon trail, what does it have to do with photography? And that's a fair question. Although I often enjoy a glass of bourbon following a day of shooting or while editing my photographs, it was really a decision to document my journey along the trail via social media which brings us closer to a photography theme. Like many of my trips I choose to shoot all the photos with my Fujifilm X100S 16.3 Megapixel Mirrorless Camera*, only this time, I used a 16 GB Eyefi Mobi SDHC Card** paired via WiFi to my Samsung Galaxy S4 phone. Now I had a blog post.
So while you enjoy a few photos of my trip, this really is a blog post about using the Eyefi Mobi with the goal of posting one Instagram photo and a Tweet following each of the nine stops along the bourbon trail. Besides, can you think of a better way to test this setup?

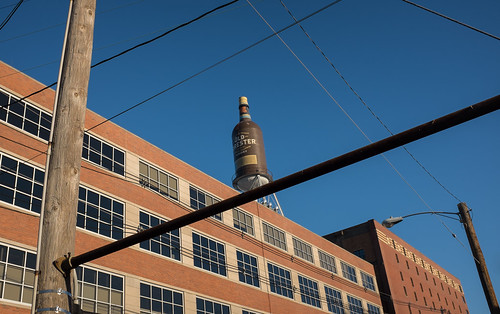
Early morning light at the Brown-Forman distillery in Louisville, Kentucky. I always seem to be drawn to oversize versions of everyday items. 1/640 @ f5.6, ISO 200.
Early morning light at the Brown-Forman distillery in Louisville, Kentucky. I always seem to be drawn to oversized versions of everyday items. 1/640 @ f5.6, ISO 200.
Before I go any further, you might be wondering if my goal was to simply share photos on Instagram and Twitter, why didn't I just take the photos with my cell phone, which after all is capable of taking decent quality images. Yes, it is true that I could have just used my phone, but as a photographer who has a camera with me all the time, why sacrifice quality and future use of the photos beyond the immediacy of social. The best camera is still a camera.

What is the Eyefi Mobi and does it make sense for you?

Photo courtesy of Amazon.com

From their website:
Add instant photo transfer to the camera you own. Eyefi Mobi sends pictures from your DSLR or point and shoot camera to your phone, tablet or desktop as soon as you take them so you can kiss the cords goodbye.
Sounds pretty simple and it is. Download and launch the Eyefi App, enter the 10-digit activation code located on the device, put the card in the camera and shoot a few jpeg images, then watch as they appear on your device. It really is that easy. I have the App running on both an Android phone and iPad 2 tablet.

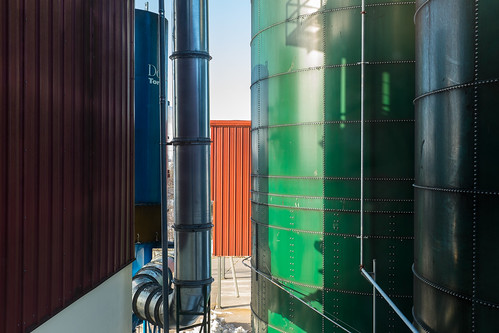
All the ingredients to make bourbon are in these tank at the Wild Turkey distillery in Lawrenceburg, Kentucky. 1/70 @ f5.6, ISO 200.
All the ingredients to make bourbon are in these tanks at the Wild Turkey distillery in Lawrenceburg, Kentucky. 1/70 @ f5.6, ISO 200.
Advantages:

Provides instant backup. It's nice to have an instant backup of your images without even having to think about it. As always with my Fuji, I have it configured to shoot jpeg+raw, so as the jpegs are backed up instantly and ready to share, I simply download the raw files (and jpegs) to my hard drive at the end of each day.

High quality images ready to share. I can't emphasize enough how nice it is to not have to compromise quality just because you want to share your work over the internet quickly. I retain all the advantages of my Fujifilm X100S camera, including the ability to capture raw photos, while still being able to share almost instantly. You do have to leave your camera on.

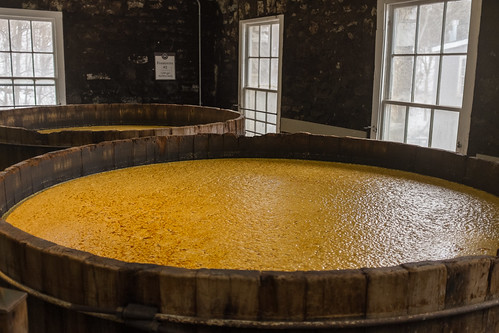
Open fermentation tanks at the Woodford Reserve distillery in Versailles, Kentucky. 1/320 @ f2.0, ISO 800.
Open fermentation tanks at the Woodford Reserve distillery in Versailles, Kentucky. 1/320 @ f2.0, ISO 800.

Disadvantages:

Only transfers jpegs. Not a big deal if you are using this as I do, transferring to a phone or tablet for quick sharing to social media. However if you using this as the only means of transferring photos from you camera to computer, it could be a problem.

Camera battery drain. The biggest issue I have experienced when using the Eyefi is that my camera battery drains about twice as fast. Also, as the battery level gets low, photos will stop transferring. You will need a second battery for your camera.

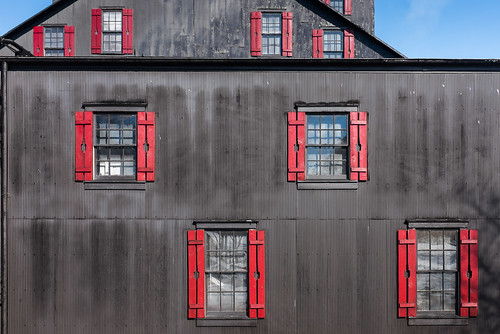
Take note of the shutters at the Makers Mark distillery in Loretto, Kentucky. 1/420 @ f8, ISO 400.
Take note of the shutters at the Makers Mark distillery in Loretto, Kentucky. 1/420 @ f8, ISO 400.
Conclusion:

Even though once in a while I noticed that the WiFi connection had dropped and photos didn't transfer, it was very rare and easily remedied by turning the camera on and off or reconnecting the WiFi through the phone settings. Actually, the biggest problem was getting a decent phone signal in some of the remote Kentucky locations.

While this isn't my everyday SD card, it does serve a real purpose and combined with low cost and ease of use, should be an easy decision to make the purchase.

For those that may be wondering, my Tweets along the trail have been some of my most favorited and retweeted posts since I joined Twitter in 2008. And I have the high-resolution images to prove it.

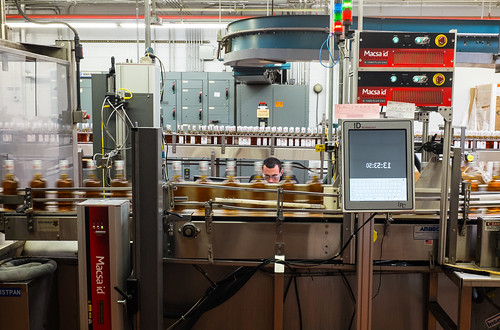
The bottling line at Jim Beam American Stillhouse in Clermont, Kentucky. None of the distilleries I visited put any restrictions on still photography, although a few requested no video be recorded. 1/25 @ f5.6, ISO 800.
The bottling line at Jim Beam American Stillhouse in Clermont, Kentucky. None of the distilleries I visited placed any restrictions on still photography, although a few requested no video be recorded. 1/25 @ f5.6, ISO 800.

* The Fujifilm X100S is becoming harder to get and has been replaced by the Fujifilm X100T which I have not had the chance to try. The Fujifilm X-T1 has built-in WiFi.

** The list of cameras that this device works with is long, however, you should still check for camera compatibility on their site.