 |
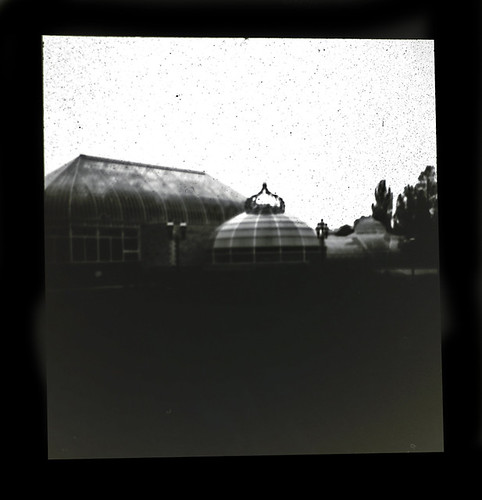
| Pinhole photograph of the Phipps Conservatory and Botanical Gardens. |
Since I knew I would be in Pittsburgh for the weekend, I loaded my camera on Thursday night and began to figure out what I would photograph on Sunday the 28th. When the day arrived it was raining and just not very nice out, but I had to make do right? I've been experimenting with exposure times over the last month and in my previous two attempts, 40 seconds was too much in bright sun and two and half minutes was not enough indoors under a mixture of natural and artificial light. I've since come across lots of resources to help solve the exposure problem and look forward to sharing as the pinhole experiments continue.
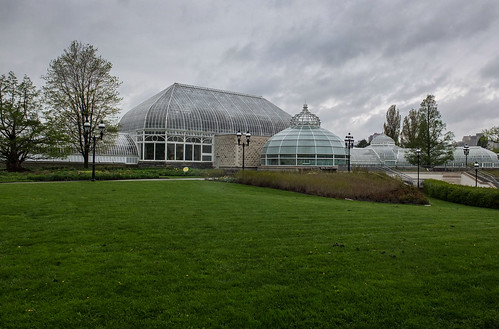 |
| 28mm photograph from same location as pinhole camera which has a focal length of 76mm. |
 |
| My pinhole mounted on a bogen tripod placed atop a parking box. |
As I mentioned in my previous post, this particular pinhole camera was built from a kit that I received as a Christmas present about ten years ago. I applied a custom paint job and added a new base made from 5/8" MDF board so that I could attach a 1/4"-20 T-Nut in order to mount to a tripod.
Inside the wood box that makes up my pinhole camera is a paper sleeve that both holds the photographic paper in place and also is where the actual pin hole is located. The hole was produced using a #10 sewing needle which equates to 0.457mm, pretty standard for a pinhole camera. However, poking a needle through the paper sleeve does not produce a very clean hole so I plan on substituting a piece of metal, probably brass, in which I will drill a slightly larger .346mm hole, giving me an f-stop of 220, based on a focal length of 76mm. I'll go into this more in future posts.
Also since my last post, I exhausted the chemicals and paper that came with the kit, so I ordered Ilford rapid fixer, Ilford Multigrade paper developer and Ilford Multigrade IV RC Deluxe 5"x7" paper with a pearl finish from Amazon.com. I cut the paper into 3"x3" sheets and mix the chemicals per directions.
My pinhole photograph from Sunday, along with a description can be found on the www.pinholeday.org website. Even though it is under exposed by about 15 seconds, at least I had something to submit.
Looking forward to writing more about pinhole in the future, possibly spinning off another blog. More to come.
No comments:
Post a Comment