Thursday, May 02, 2013

TIME FOR AN UPGRADE? FUJI X10 OR X100S


Is it time for an upgrade? Fuji X100S vs. X10

I purchased my Fujifilm X10, above at right, in November 2012, and wrote about it in what has become my most viewed blog post, INTRODUCING MY X10. Since then I've carried this camera almost daily and six months later I have no regrets. It has been a wonderful little camera and I still like how it looks and feels and continue to be impressed with the quality of the images.

So why have I been thinking about upgrading to the Fujifilm X100S camera? While I am not looking to replace my DSLR and lenses for work assignments, upgrading to this camera could render a second DSLR on assignment useless.
Fujifilm X100S front view
Fuji X100S. Photo provided by Fujifilm.com
Announced in January, the X100S began shipping in March and so far the hands-on reviews have been very positive. If you just read the blog reviews by Zack Arias and David Hobby, you'll want the camera immediately, however, at the time of this post there is a one to two month wait list.

Having such fun and success with my X10, which Fuji recently replaced with the Fujifilm X20, I immediately thought about upgrading. In my original blog post about the X10, I laid out the reasons why I purchased that camera instead of the X100 and cost and focus issues were two of them. Well it seems focus is no longer a concern, but there is still the question of cost. At around $1,300, that clearly puts the X100S in the realm of a pro camera and not a simple point and shoot. Even though many of today's point and shoots, or sub $600 cameras, are capable of taking incredible images, just look at the X20 or what I paid for my X10, as examples.

So should I upgrade or not? To help answer that question, or maybe just convince myself one way or another, I decided to take my X10 and visit the National Air and Space Museum Steven F. Udvar-Hazy Center located in Chantilly, Va., in order to take some photos and see if I would be happier if I were carrying the X100S instead.
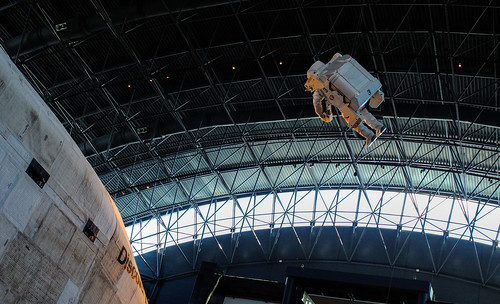
Photograph taken at the National Air and Space Museum Steven F. Udvar-Hazy Center using a Fuji X10 set at 1/80, f3.6, ISO 400, 40mm equivalent, film simulation set to Velvia.
Fuji X10 at 1/80, f3.6, ISO 400, 40mm equivalent, film simulation set to Velvia.
The lighting in parts of the museum is very dim requiring higher ISOs. Advantage X100S. By all accounts the X100S does remarkably well at high ISOs, even 3200. I rarely push the X10 past 800. The built-in flash on the X10 is not really usable so being able to get usable photos at ISO 3200 is a real bonus. I shot mostly at ISO 400 at the museum which meant I was shooting at very slow shutter speeds, but since I was photographing static objects it was not an issue.
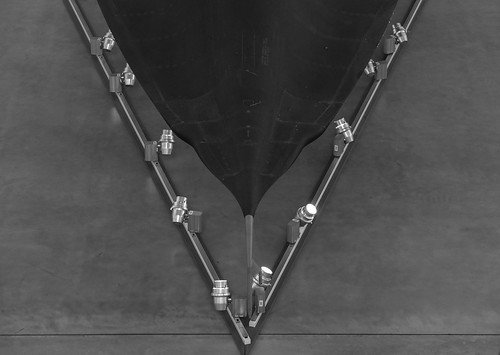
Photograph taken at the National Air and Space Museum Steven F. Udvar-Hazy Center using a Fuji X10 at 1/13, f2.8, ISO 400, 112mm equivalent, film simulation set to black and white.
Fuji X10 at 1/13, f2.8, ISO 400, 112mm equivalent, film simulation set to black and white.
While most of the photos I take with the X10 are at 7.1mm or 28mm equivalent on a 35mm lens, I do sometimes find myself using the zoom, as I did often during this shoot. Advantage X10. Would I have been able to get away with just a 35mm point of view? I suppose I should not have used the zoom in order to really test that theory. Zoom with your feet, isn't that what's said.

Did you notice what I did in the previous paragraphs? I both stated one of the big reasons I am considering the X100S and one of the reasons why I am questioning if it really is the camera for me. But honestly, there is more than just ISO and zoom.
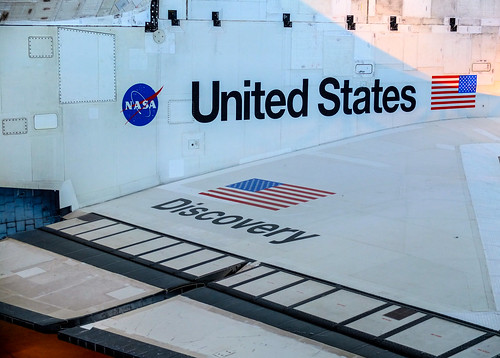
Photograph taken at the National Air and Space Museum Steven F. Udvar-Hazy Center using a Fuji X10 at 1/25, f2.8, ISO 400, 60mm equivalent, film simulation set to standard.
Fuji X10 at 1/25, f2.8, ISO 400, 60mm equivalent, film simulation set to standard.
Ever since I purchased my first digital P&S camera I've always insisted on some sort of a viewfinder. The X10 does have a veiwfinder, but the X100S with both an electronic or optical viewfinder, takes it to the next level making the viewfinder incredibly usable. Advantage X100S.

Many of the other features are very similar or the same, although the X100S is a 16MP camera versus 12MP and has a nine blade aperture shutter instead of seven, the X10 does shoot 10 fps continuous versus 6 fps. Advantage on these features favors neither X10 nor the X100S. That is to say they are not part of my decision process.

Finally, after shooting the X10 for seven months, I really don't need to be sold on the look, feel and form of this camera. While I didn't fully appreciate it at the time, I did use a Leica M3 as a second camera for several years in my early Navy career and this does have that same feel. Some of the photos I shot at the museum were taken with the camera set to black and white which made me think I really was transported back 25 years holding that M3 loaded with Tri-X film. Holding these Fuji X cameras  does elicit certain emotions. Is it because I'm a little older? Maybe, but I  believe part of making good images is attitude and how you feel about your gear does play a role in that.
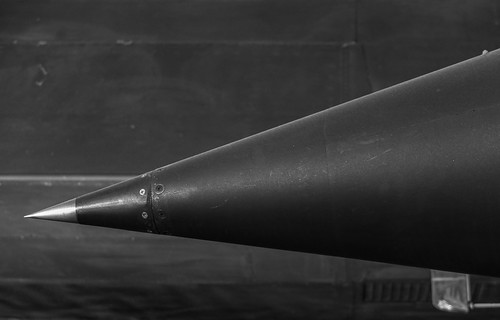
Photograph taken at the National Air and Space Museum Steven F. Udvar-Hazy Center using a Fuji X10 at 1/10, f2.8, ISO 400, 100mm equivalent, film simulation set to black and white.
Fuji X10 at 1/10, f2.8, ISO 400, 100mm equivalent, film simulation set to black and white.
I could go on and on about the advantages and disadvantages, but I'm clearly not going to answer my question during this blog post and even now as I look forward to a vacation in Toronto and an upcoming assignment, a video shoot in Hawaii, I'm thinking long and hard if I want to take the DSLR with various lenses or just the X10. Or possibly even the X100S?

One question I will answer is that I do think this would make a perfect second body on any assignment.

The rest of the details and more links below:

Specifications X100S:

Number of effective pixels: 16.3 million
Image sensor: 23.6mm x 15.mm (APS-C)
Lens: 35mm equivalent at f2.0
Dimensions: 5.0 (W) x 2.9 (H) x 2.1 (D) in.
Weight: Approx. 15.7 oz. (including battery and memory card)
Sample images from the Fuji website.

Specifications X10:

Number of effective pixels: 12 million
Image sensor: 2 / 3 inch EXR CMOS
Lens: 28mm to 112mm equivalent at f2.0 and f2.8 respectfully
Dimensions: 4.6(W) x 2.7(H) x 2.2(D) in.
Weight: 12.3 oz. (including battery and memory card)
Sample images from my Flickr X10 set.

David Hobby provides a thorough overview of all the X100S features in a YouTube video. And I even learned something new about my X10 as well by watching this.

And just in case the leap from X10 to X100S is too much, then check out Dan Bailey's full review on the X20.

Get the full X100S specifications available on Fuji's website.

Thursday, April 18, 2013

JUST PHOTOGRAPHY BOOKS ON THE SHELF?

Photography books in the stacks at the Arlington County public library.

I was at the Arlington County library a few weeks back doing research for a book I'm currently writing (not photo related) and found myself in the photography section. I guess I was drawn there by some invisible force.

Anyway, while looking over all the titles and authors the thought hit me that there have been so many incredible photographers over the years and yet for the past couple of years I've only been following current, mostly young, photographers.

In just one small section of one shelf there were books by Mary Ellen Mark, Arnold Newman, Edward Weston, Robert Capa, Man Ray, Annie Leibowitz, Eve Arnold and even a copy of Edward Steichen's The Family Of Man, a personal favorite.

Before I go any farther, this isn't a post about how today's photographers are nothing compared to the pioneers of the past or about how you can't possibly understand the art of photography if you don't study the masters. I suppose what really struck me is just how soon I forgot. Why did I temporarily forget about these photographers.

Unless you are studying photography in college or at a university, is there really a need to look back and see what came before? I've heard and read this question many times, almost as often as whether you can be a true photographer if you never shot film, or for that matter worked in a darkroom.

The first thing I thought as I looked over the titles wasn't just the fact that its been a while since I thought about these photographers, but that's probably because I haven't seen them on Google +, Facebook or Twitter.  For those photographers still with us, do they have a website or blog? You see, more and more that is how I follow photographers and I suspect that is how you follow them too.
The cover of This is War by David Douglas Duncan
The photographer David Douglass Duncan is a personal favorite of mine and in 1995 I built a website featuring his work. The Web was still new and since there was nothing available online, I did my research in the library and copied a variety of Duncan's photographs with my camera. For years after that I would hear from publishers requesting to license those photographs, or for information on contacting Duncan. All this despite a clear disclaimer on the site that I did not represent Mr. Duncan and that this website was produced for a college electronic journalism class. What if Duncan had access to publish his photographs on the Web or participate in Google Hangouts? I suspect as private a person as Duncan was the result would be the same, however I've been surprised by others adoption of technology.

Today's digital cameras and software make it possible for photographers at all levels to take better photographs and then instantly publish and share those images widely, offering new and old photographers alike the chance to grow, improve and even create a nice following. Plus there are a ton of tutorials, many free, to help you along the way, even without a formal education.

So with that I challenge everyone to visit the library and spend some time looking through the stacks where you might be surprised at what you discover. The first surprise you might notice is that not every technique or subject you've viewed on the Web is new. It's only the Web that is new.

So if you find yourself following the same photographers all the time, and are craving something different, I might suggest you start with any book from the photograph at the top of this post.

And keep shooting and sharing.

Thursday, April 04, 2013

A PINHOLE OF A PINHOLE

Photograph of "Topsy-Turvy: A Camera Obscura Installation" located in Madison Square Park in New York City.
"Topsy-Turvy: A Camera Obscura Installation," was on temporary display in New York's Madison Square Park.
I received a pinhole camera kit for Christmas about ten years ago and remember thinking what a really cool gift it was and that I couldn't wait to build this camera and start taking photographs. However, even before I started building the camera, I couldn't help thinking about what would be the first thing I photographed. And that's where my thoughts stopped.

So the kit was put away in a desk drawer and although I would often come across it during the past decade, I still couldn't imagine taking that first photo.

Then earlier this month I came across a tweet about a camera obscura on display in New York City's Madison Square Park and all of a sudden I realized that I now had the perfect first photograph for my pinhole camera. A pinhole photograph of a pinhole camera. That was it.
Contents of Pinhole photography kit from Flights of Fancy.
Wood pinhole photography kit complete with everything you need to develop your photographs.
Artists Sandra Gibson and Luis Recoder set up this 10x10-foot walk-in camera they dubbed “Topsy-Turvy: A Camera Obscura Installation,” in the Flat Iron district of New York City to educate the public. The exhibit was on display through April 5th.

I retrieved the kit from my desk and started looking through the instructions while at the same time planning my day trip to New York. The kit came with everything I needed to construct the camera, plus everything I needed to develop the paper. I wasn't even deterred when I noticed the developer and fixer had expired in 2008.

The pinhole camera was simple to construct and took about 15 minutes to build. I did make a slight modification to the finished camera by adding a 1/2 inch piece of MDF board to the bottom of the camera so I could insert a 1/4"-20 T-Nut so I could attach my camera to a tripod.

Photograph of my pinhole camera with the camera obscura in the background.
Almost complete pinhole camera. Still need to finish the paint job and make additional modifications to the base.
The last thing I did was dig through the attic and find my old darkroom safelight, a Kodak Model B. The kit does provide a red sheet of plastic that could be placed over a light source in case you don't have access to a safelight.

The night before I left for New York I went into the darkroom/bathroom, plugged in the safelight and loaded a 3x3 inch piece of photographic paper into the camera.

I arrived in New York around 10:30 a.m. the next day and walked the nine blocks to Madison Square Park and quickly located the camera obscura at the south end of the park aimed at the historic Flat Iron Building. A couple was just exiting the camera when I arrived so along with the attendant I stepped inside and after a few minutes my eyes adjusted and the surrounding area came into focus. To me, it is fascinating to realize that this is exactly what it would look like if I could step inside the small pinhole camera I had in my bag.

When I exited the camera I walked around the area for a while thinking about the photograph I was about to take. I literally only had one shot and not having used this camera before I wasn't sure what the focal length would be or how long of an exposure to use. The pamphlet that came with the kit did offer suggested exposure times based on the available light.

A photograph that shows the relation between my pinhole camera and the camera obscura.
My pinhole camera all set to take a 45-second exposure of the camera obscura.
I placed the pinhole camera on a light stand I brought along to act as a tripod, took a deep breath, waited for some park goers to get out of the way and then pushed aside the little door covering the pinhole and started the countdown. The pamphlet recommended a 30-second exposure in bright sunlight. I settled on a 45-second exposure because of some open shade in the park.

After I closed the cover I was done. Seemed anticlimactic. I stuck the box back into my bag and went about the rest of the day taking photos of New York City.

I returned home around 11:45 that night and briefly thought that I should wait until the next day to process the photograph, but soon realized that was not going to happen. So once again I set up my makeshift darkroom and went about mixing the developer and fixer. The last time I was in a darkroom was 1997 but when I smelled the fixer it was like I was there yesterday.

A pinhole photograph after being converted from a negative to a positive using Lightroom 4.
Pinhole #1.
I opened the camera and retrieved the paper negative and placed it in the developer and... Nothing! I started to panic and question whether I had put the paper in camera correctly or perhaps not made a long enough exposure. Then I remembered that the chemicals were five years past the date of best use. So after a couple of minutes of not seeing an image appear I added some additional developer and finally Pinhole #1 revealed itself in the miniature tray.

A view of the Flat Iron neighbor as seen on the wall inside the camera obscura.
The Flat Iron Building at left as seen upside down and backward inside the camera obscura.
Just like the image I saw on the wall inside Topsy-Turvy, the image you will get is a negative and reversed. There are two options to correct this. The first is to place the paper with the negative image face down over another sheet of photographic paper, place a piece of glass or plexiglass over both sheets of paper and expose them to white light, then process the paper as before. Remember, everything with the exception of turning on the white light must be done under a safelight in the darkroom.

The second method and the one that I choose is to photograph the pinhole photograph with a digital camera and then using a program such as Adobe Lightroom or Photoshop, flip the tone curve and rotate horizontally to get a corrected image. I explained this process in my blog post about using your digital camera to copy old negatives.

I have some exciting things planned for this pinhole camera and with camera obscuras in the future, so keep reading this blog and be sure to follow me on Twitter.

Thursday, March 21, 2013

STAR GAZING - PHOTOGRAPHY AT NIGHT

Monument Valley at 3 am. Camera settings: ISO 2000, 20 sec., f 2.8.
Much like my recent post offering five tips on photographing in Upper Antelope Canyon, I admit that this post offering my thoughts on photographing stars doesn't come from years of experience. In fact this was my first real attempt.

So why should you continue reading?

Because with any photographic technique there will always be a first time. And because I come to these new situations with years of photographic experience behind me, I think my approach and the lessons learned can help you as you expand your photographic horizons and explore new areas or genres of photography.

I mentioned briefly in my post about planning for my Arizona trip that one of the things I wanted to do was try shooting at night. Coincidentally, I also realized that I was going to be in Monument Valley during a large meteor shower, so my expectations were high.

What did I learn?

Star photography is much more that putting you camera on a tripod, setting a long exposure and sitting back while the magic happens.

And of course you already know that you'll need a sturdy tripod, cable release and a flashlight (headlamp works best), right?

Horseshoe Bend at 5 am. Camera settings: ISO 1600, 20 sec., f 3.5.
Probably the first thing I learned was to crank up the ISO. I went as high as 3200, but found that 1600 worked best. Normally when using a tripod, your first thought is to use the lowest ISO available since the possibility of camera shake caused by a lower shutter speed is minimized. But when you consider that the planet your tripod is linked to is moving, a slow shutter speed will cause the stars to blur if the shutter is open too long causing the stars to blur, thus making everything seem out of focus.

Speaking of focus, the second thing I learned is that obtaining sharp focus at night is really difficult. While you think you might be able to set your lens to infinity and all will be good, you'd be wrong. If there is something in the foreground such as a tree or barn that you can shine a light on to set focus then you are fine. Absent that, I would set my focus to infinity, then back off just a bit, take a series of photos, go to the laptop and check focus. I was never able to determine true focus using the back of the camera, even when using a Zacuto Z-Finder Pro.

Even though it appeared very dark, lights from a far-off town became visible on the horizon during the long exposure. Camera Settings: ISO 3200, 30 sec., f 2.8.
Monument Valley was dark, really dark, and remember that darkness is your friend when shooting the night sky, despite the focus issues previously mentioned. Light pollution is all around us, so the farther from civilization you can get, the better. Even as dark as it was in the Arizona desert, I noticed bright spots on the horizon from far off towns would appear after long exposures.

I found a shutter speed between 20 and 35 seconds worked best. Anything longer and you will definitely have soft stars. I set the f-stop somewhere between 2.8 or 3.2, which again seems to go against conventional thinking when using a tripod and trying to achieve a deep depth of field with everything in focus from near to far.

However, if you think about it, you need to strike a balance between getting the most light into the camera without too long of a shutter speed, which is why you crank up the ISO. Luckily today's cameras can handle the higher ISOs.

Remember, even if the temperature is warm during the day, it can get really cold at night, so dress warmly, bring extra layers and maybe a thermos of hot chocolate or coffee. You want to be comfortable when you settle in for a long night of shooting the stars.


Monday, March 11, 2013

DEJA VU COVERAGE - SAME PHOTOGRAPHS, DIFFERENT DAY

When Dr. Robert Ballard, probably most known for the discovery of the RMS Titanic, stepped in front of a screen depicting the future of underwater exploration, I knew I had my photograph.
If you are a corporate photographer and find yourself taking pictures in the same location over and over again, then this post is for you. If you are an event photographer that returns to the same location over and over again, then this post is for you. And if you are either one of these photographers and want to create unique pictures every time you are at this location, then this post is for you.

In my case, I am responsible for covering ceremonies, conferences, and speakers in our corporate conference center several times a month. Everyone from famous oceanographers, Nobel Prize winners, four-star admirals and generals, authors and scientists have passed through and while the presentations are fascinating, it is the same venue, same light, same big screens, etc. You get the picture.

When a Time Magazine cover featuring Albert Einstein appeared on screen I knew that it would make a different photo of Nobel Prize physicist Dr. William D. Phillips.
In this post I'll focus mainly on covering speakers and presentations as opposed to events. So how do I make that interesting or different when I've been shooting in this location for eight years?  Well read on.

On the surface it would appear that nothing changes expect the person and that would seem like the big disadvantage, right? Not really. Your first advantage is that the basics of the environment doesn't change, which means your exposure doesn't really change. I know that I'm going to put my camera on manual with a shutter speed of 100, f-stop around 3.2 and an ISO of 1600. Now that might change just a bit on occasion depending on whether the speaker remains in the front of the room or moves around. But in any case it will only change a stop or so in either direction.

It wasn't until the final slide of his presentation, which featured the cover of his new book, that I felt I had a usable photo of Dr. Peter W. Singer.
The second advantage, and this will save you time in post processing, is you can assign a custom white balance and forget it. As I'm walking up the stairs to our conference center, I set my camera as stated above and make sure that my camera's white balance is set on custom. Now when I enter the room all my attention is on how I'm going to make these images different from the previous ones. All the technical issues were solved years ago.

Which brings us to the title of this post, the fact that you really are shooting the same scene over and over and the changes you are looking for can be subtle.

The dark slide behind former Chief of Naval Operations Adm. Gary Roughead provided nice contrast with his uniform.
More than 90% of the speakers have some type of Power Point slides or video they use during the presentation. You can use those slides to your advantage. Since I am able to include a large video screen in my frame whether I'm shooting from the left or right, I wait for a slide that in some way works visually with the speaker. It could be a graphic or have strong color and because you control the depth of field, it is your decision on how much you want the viewer to know. If it's the title slide or has words that help identify the speaker, then a little deeper depth of field is the answer, or if it is a graphic element or strong color, then shallower normally works.

Professor and complex network theorist, Dr. Albert-Laszlo Barabasi, had some complicated slides so I opted for a  shallow depth of field and waited. 
In one sense I'm fortunate that I have those video screens to use since they do provide endless opportunities. So what if you don't have anything like that? If that was the case, I would most likely place a colored gel and strobe the background to add some punch. Or maybe place some temporary art on the wall that you are confident you could use as visual elements. That's assuming this is a space that you control.

I realize every venue is different, so the key is to figure out all of the basics first, such as shutter speed, white balance and f-stops. The real point is that if you are required to photograph in the same location, then master that location, embrace that location and most of all, be creative in that location. You don't have a choice, right?